NOTE: Please read the entire tutorial at least once before attempting the techniques described with 3rd PlanIt.
Roger Van Parys asked this question in an email after viewing my photos page of this website.
Ryan: I checked your progress shots... Super! I have 3rd PlanIt and have completed my plan and the benchwork. I am now ready to
install the trackwork. I noted that you used 1:1 for your layout. What are the steps for converting from HO to 1:1... Specifically
can you copy from HO and paste 1:1 ? If I can do that then easements are not a problem. I can print the plan, paste it together and mark and cut.
This is a great question and one technique and trick in 3rd PlanIt that takes some effort to perfect. Here is my answer to Roger's questions.
Roger,
I appreciate your noticing my progress. I hope to post more images soon from work I have done from December to date.
To answer your question on the 3rd PlanIt 1:1 printing, there are a few ways that you can manipulate the application to print your template. Any scale can be printed, so HO when printed 1:1 ratio will come out the exact size of the make and model track you are using on the track plan. I will mention a little about the other option that I do not use, and then tell you how I print it out for cutting my plywood roadbed.
Some people use a plug-in that converts the print file so that it can be formatted for a plotter and printed out on a continuous 3' wide sheet of paper. Kinko's or other print shops will print out the file, but this can be quite expensive, that is why I go with the 1:1 printout on standard 8 1/2" X 11" paper.
Here are a few screen shots of what I do to print out a section at a time of the track plan.
First I make sure the track plan is open in 3rd PlanIt. Then I select File, then Print from the main screen toolbar, then you will see the print Page setup window:
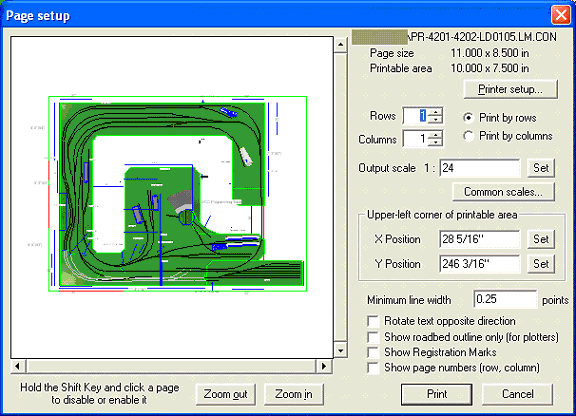
You will notice that there is a selection for Output scale 1: ___. Also notice that the green box currently is surrounding the entire layout plan. Highlight the number in the Output scale window and then type in the number 1. Then click the Set button next to the open window.
The print Page setup window now changes to this:
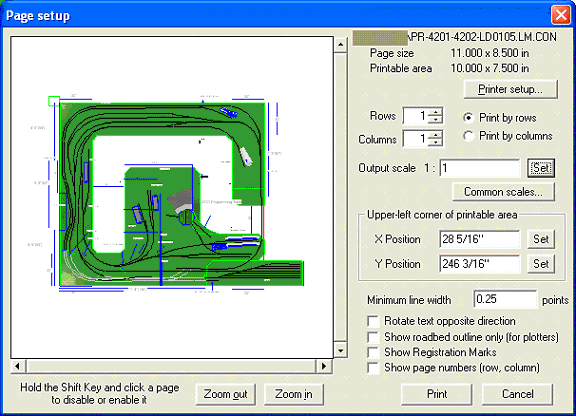
Notice that the green box is smaller, and to the upper left side of the layout drawing. Notice that the Output scale is now set to 1:1 ratio.
Now, also notice the Rows __ and Columns __ selections.
This is where you can select where and how many of each row and columns you want to print. I also enlarge the viewable area so that I can get a better view of what I want to print. I click the Zoom in button a few times and move the scroll bar over so the view appears as below:
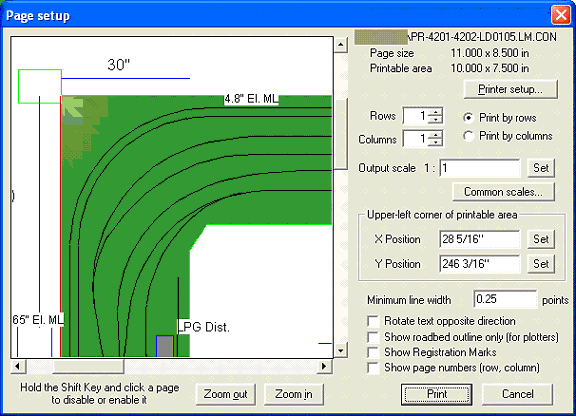
Now you have a choice to keep the print page orientation as landscape or portrait. If you want to change this setting, do so by clicking the Printer setup button. Then select portrait and then the OK button.
Now you can select how much of the layout you want to print in your first print job. You will need to scroll the highlighed print queue to the area of the track plan that you want to have printed.
For example I have selected 4 Rows and 3 Columns, as in the image below:
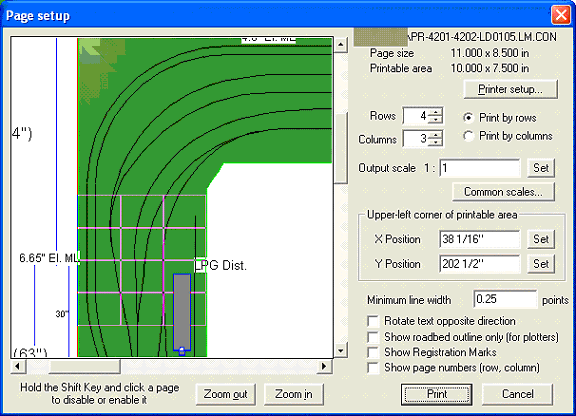
Now click the Print button and your print job will now print 12 pages of the 1:1 template.
Also, you might want to check the Show page numbers (row, column) as well, this helps to line them up when you tape them together. I usually cut off and trim the excess paper from one or more sides of the printouts so that I can match them up side to side and top to bottom.
TIP: Before you go to the print stage, with the track plan file open, and from the main 3rd PlanIt screen toolbar click on File, then Settings, and then click the Grid tab and modify the grid settings:
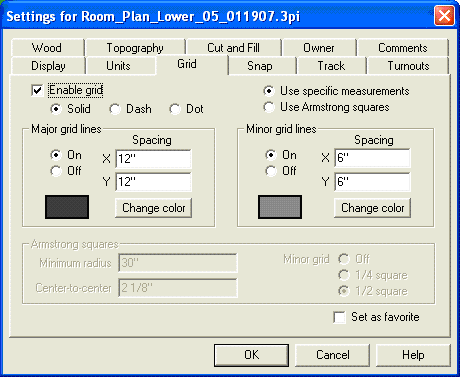
The defaults are shown above, but before I make my print out I change the Major grid lines spacing to 6" on the X and Y Spacing settings, then I change the Minor grid lines Spacing settings on the X and Y to 3" each.
This helps greatly in lining up the individual printed pages when you are taping them together.
Now that you have read this tutorial in it's entirety, please open up 3rd PlanIt and start printing your 1:1 templates.
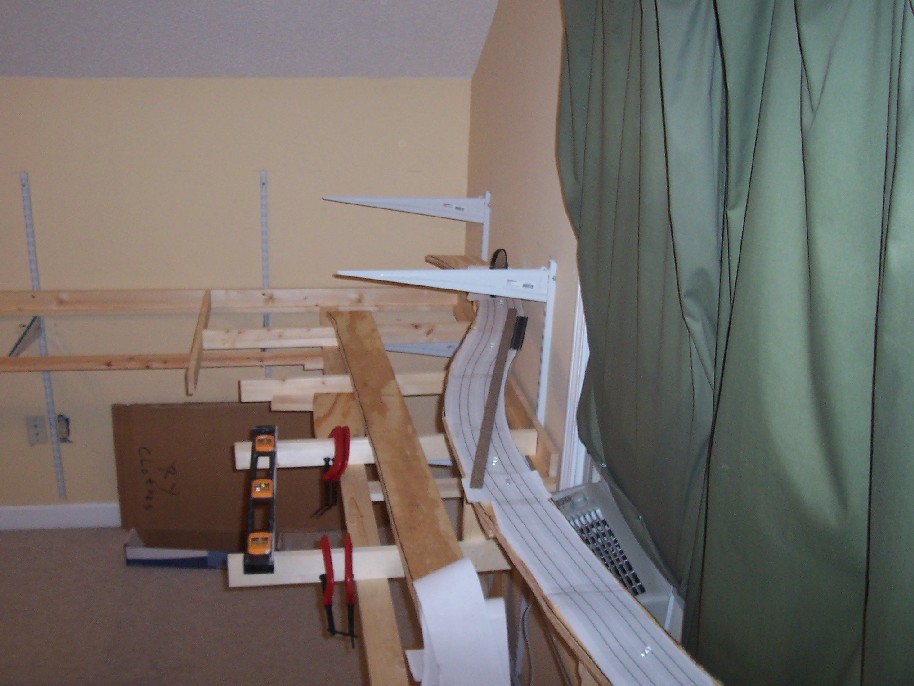
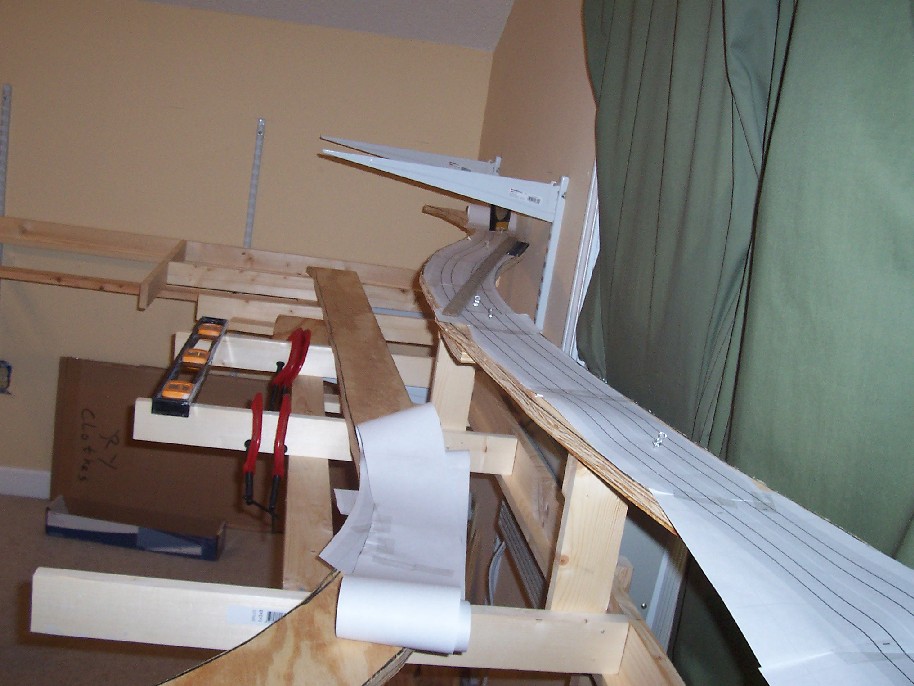
Here are a few images of my 1:1 track templates:
This is a section of 8 1/2" X 11" printed templates that I taped together for the lower level deck. I positioned the template over the section of sub-roadbed plywood and then I used a hobby knife and made short 1" cuts about every 6 inches or so down the centerline of the track roadbed template:
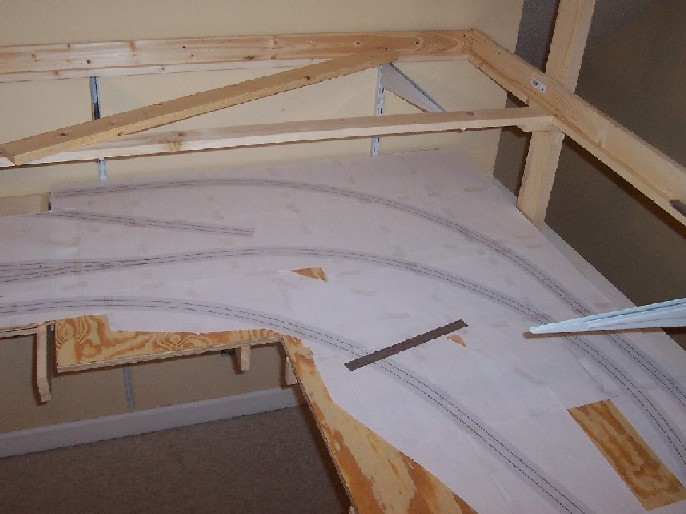
Then I used a pencil and marked through the 1" template cuts and onto the plywood. This gave me a guide to draw the lines together, sort of like "connect the dots".
I then use these lines as guides for putting down the cork roadbed material.
For cookie cutter cuts, I take the template and cut away around the sides of the printed roadbed and leave about an inch of extra space.
Then I take a black marker and trace around the template cut out, this marks where I will make my saw cuts on the sub-roadbed plywood:

Here are a few of the sub-roadbed cuts with the templates cut out and in position for marking the centerline.
