The Piedmont Division
Norfolk Southern, Southern, and Norfolk & Western Railways


Construction
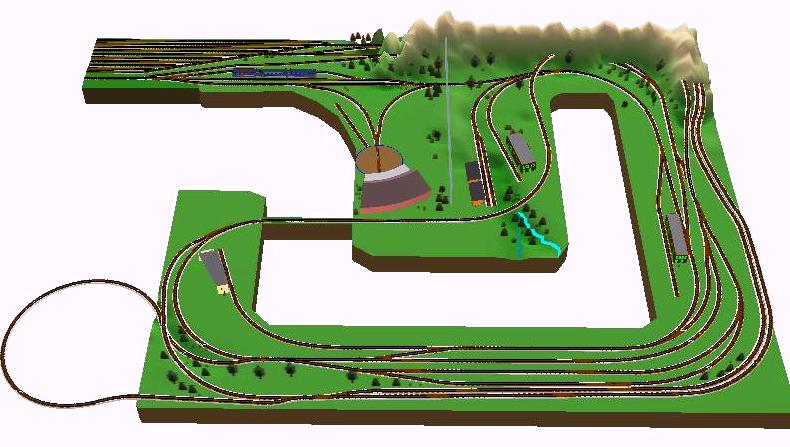
The Plan"The Plan" has been a work in progress and it continues to evolve, as I am sure it will even as the track is being put down. The latest updated versions are represented below in the lower deck and upper deck images. There is also a 3-D view of the lower deck, and all of these are produced from 3rd PlanIt Track Planning Software. |
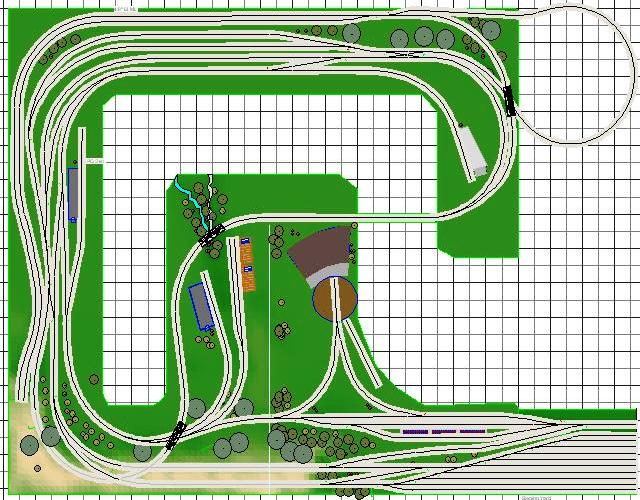
Lower Deck 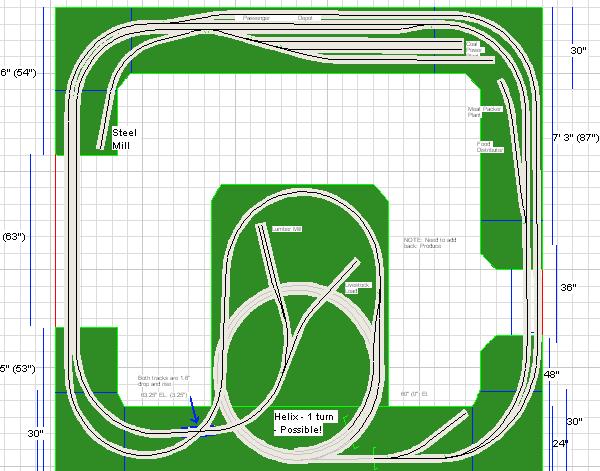
Upper Deck |
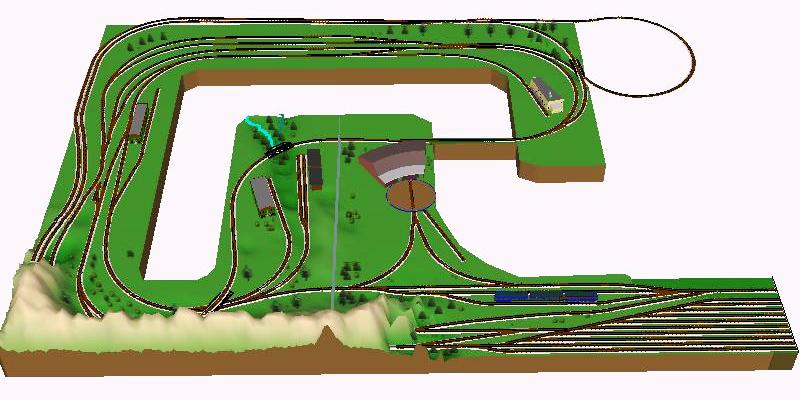
3-D View Facing South 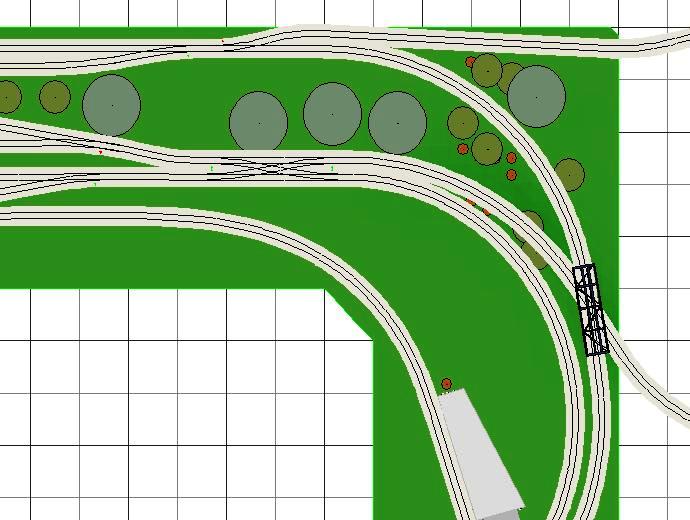
Double Crossover |
3-D View Facing North 
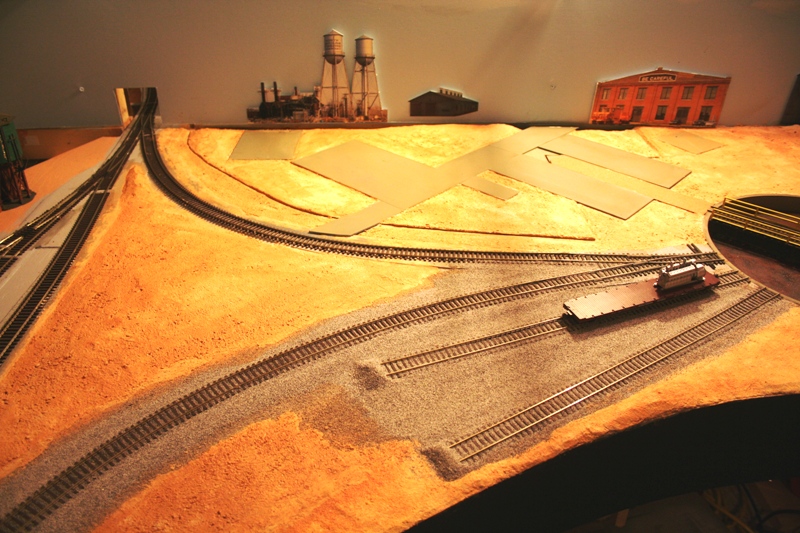
Staging Yard and RHTT Area 3D View |
|
After much consideration and thought I have developed a plan to add a main line loop (see image above) from the west end lead track of the classification yard to the double track main line. This design eliminates the need for extra moves and allows freight consists and through passenger traffic to enter the main without having to back up first. The interesting aspect about this design is that the loop will run over the stairs area and will be mostly a hidden area from the main layout scene. |
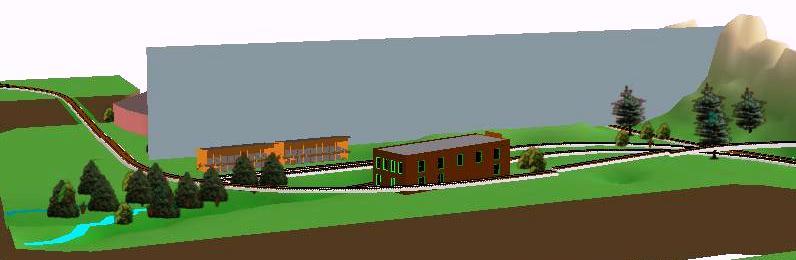
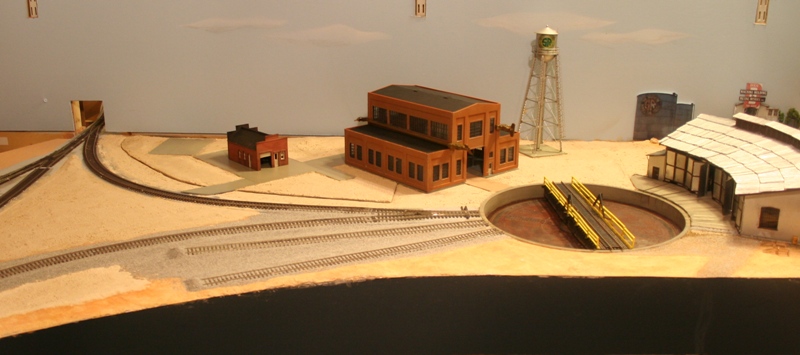
Lumber and Steel Industry 3D View |
Phase I - Lower Deck
Construction and Building Progress
The primary benchwork construction style I selected was the result of two articles published in Model Railroader Magazine. The first article that I encountered and which influenced my decision was Support your benchwork on brackets by Lionel Strang published in his monthly "Working on the Railroad" column, October 2001. This idea really took hold with me especially since I had began a layout project back in the early 1990's and ended up having to take it down before much track was laid due to a move. The layout benchwork at the time was L-girder 1X3 with a 1X2 flange and supported on 2X2 legs. With so many legs and cross members it did not lend to easy access under the benchwork deck level. And I also wanted a design that would allow for storage under the layout. The original article by Lionel Strang can still be viewed on the Model Railroader web site: Support your benchwork on brackets.
Then I read the article that was a part of the "Great Layout Project" series in the August 2003 issue of Model Railroader entitled Build a layout WITHOUT LEGS by Roger Kujawa. His web site can still be found at AGW Railway. He uses heavy-duty shelf brackets that provide strength and flexibility. BINGO! This was it, a light bulb went off in my head and the wheels began rolling. The short article on pages 80 to 81 in the August 2003 issue of Model Railroader got the ball rolling, I finally pinned down my benchwork building scheme.
So there it is! Shelf bracket benchwork supports for an around the wall system with only a few legs for areas away from the wall and one section passing under a window. See the photos on the Gallery Intro page to see the progress.
Other reference material on benchwork that I have found invaluable is: How to build Model Railroad Benchwork by Linn H. Westcott, published by Kalmbach Books. I have both the first edition published in 1979, and the second edition published in 1996.
Phase II - Upper Deck
The upper deck benchwork construction started in full swing on Thursday, January 8, 2009 with the north wall and moved to the peninsula section. Lighting was added under the upper deck benchwork to illuminate the lower deck as well. Total time on this project logged from Friday, January 2, 2009 through Sunday, January 11, 2009 is 23.5 hours.
Layout Progress Reports
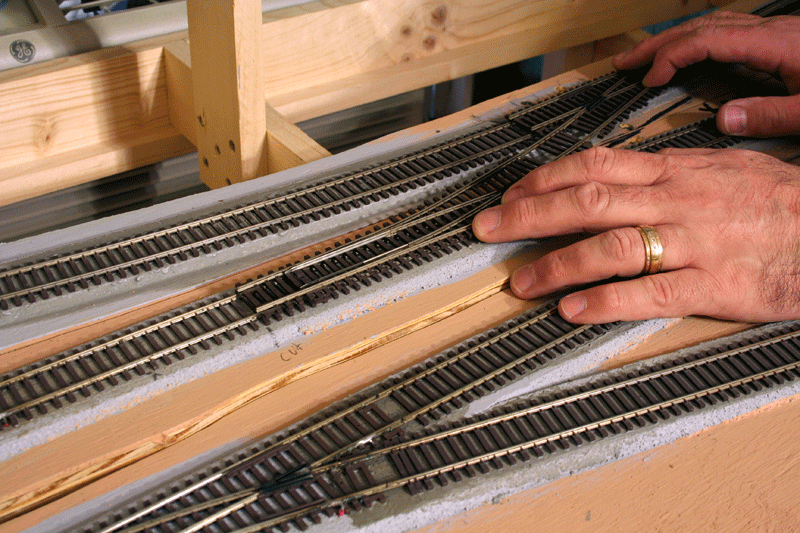
December 30, 2008 ~ Track Replacement Surgery ~ Not quite as long a recovery as hip or knee replacement, but getting myself prepared for the task took a little longer than expected. You see, the doctors at the Piedmont Division (PD) first identified the ailment and planned some time ago, as I recall about fourteen months ago (10/2007) that the layout track scheme needed a pair of turnouts to aid in a more direct path between the freight/staging/fiddle yard and the classification yard. The answer to the illness was to add a pair of turnouts, but it also meant that two sections of existing track would have to be replaced. At that time the PD intern was not quite up for doing the delicate operation. Read more...
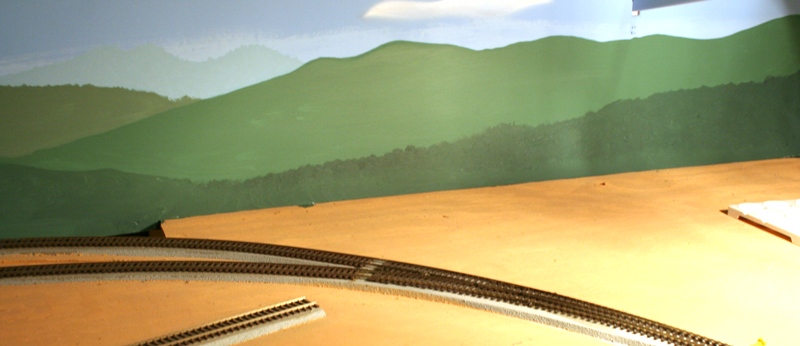
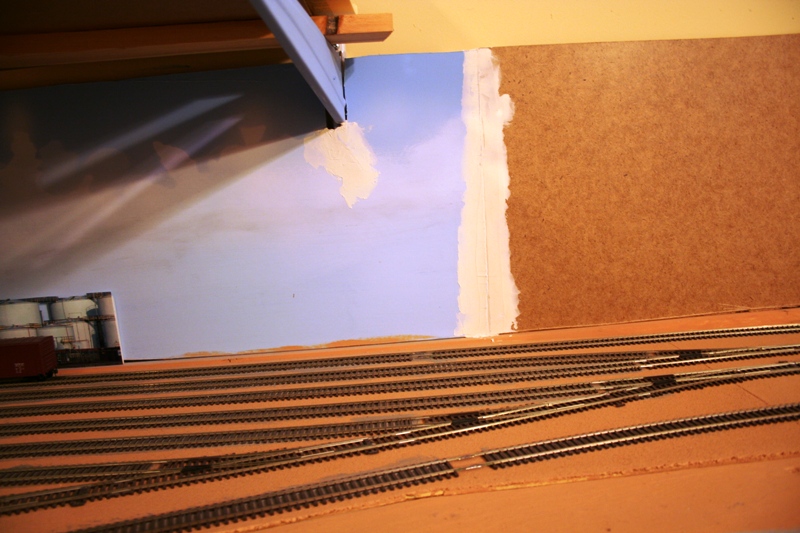
December 11, 2008 ~ After reading most of the "How-To Guide" Painting Backdrops For Your Model Railroad by Mike Danneman and published by Model Railroader Books I decided it was time to tackle the next step on my blue backdrop. I took notes and also made a list of paints and brushes I needed to ensure I was up to speed on creating my mountain scenery. Read more...
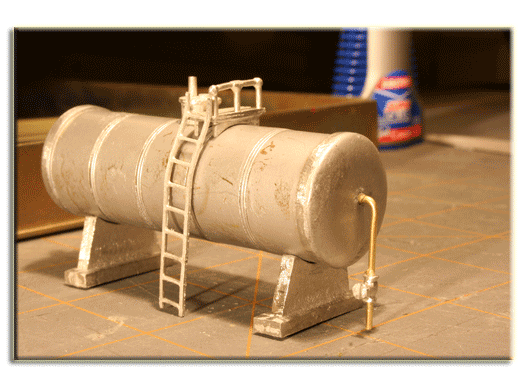
August 16, 2008 ~ More painting done on the details machining tools to highlight the user functions and parts of each tool. Also put together the diesel oil storage tank, though it still needs painting.
August 5, 2008 ~ Finally read up on some of the manual for the digital camera and learned how to set the f-stop aperture for greater depth of field and took a few new photos in the train room last night. The results of those images can be seen on the new Photo Gallery Page August 2008.
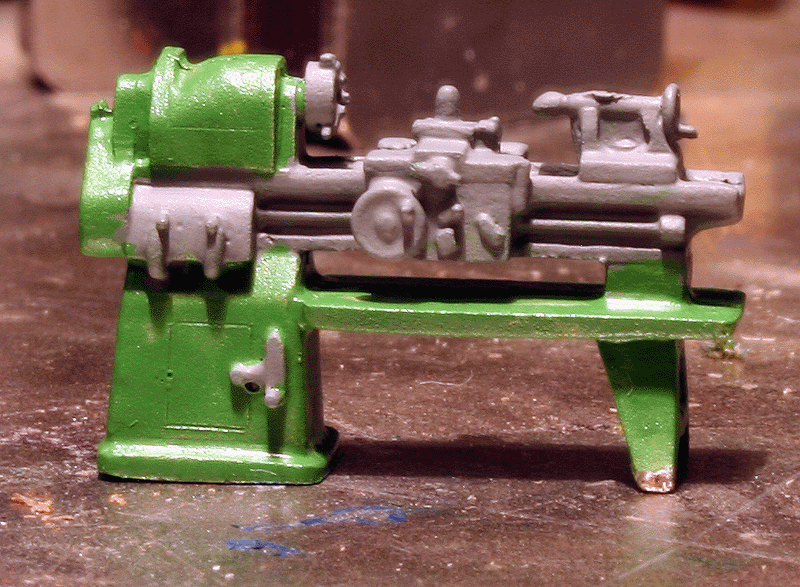
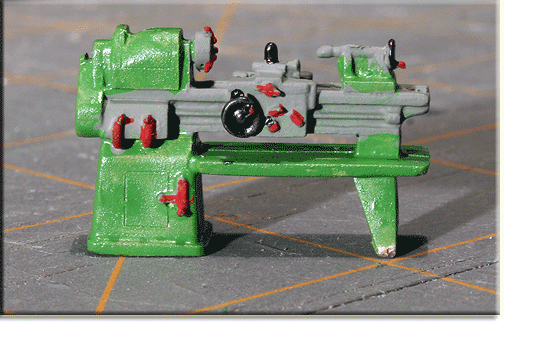
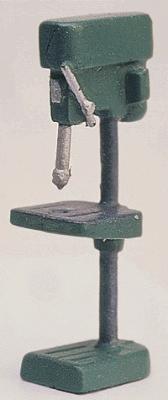
Sunday, July 27, 2008 ~ Well I finally got some time in the train room and did some filing and painting on some Alexander Scale Models heavy tooling equipment. I actually spent about two hours in the train room Sunday and started some filing and painting of the Alexander Scale heavy tooling equipment. I started with the Modern Drill Press Floor Model and then worked on the Bridgeport Vertical Milling Machine, and then put a coat on the Lathe Tool Maker. I need to get me one of those alligator clamp thingys, my hands are as steady as they used to be.

April 25, 2008 ~ Scenery was added to the engine terminal servicing facility area with the application of the scenery base wash paint and then allowed to dry. Then various colors and textures of ground foam were added to the slope and ridge behind the roundhouse, in the middle of the wye and other areas around the tracks and structures. Also added a new manual ground throw to the wye switch leading to the turntable. To see more images from this stage of the project go to the April 2008 photo gallery page.
April 18, 2008 ~ The TGX HO boxcar was sighted arriving on the inbound tracks of the classification yard near Asheville, NC on the Piedmont Division. Looks like the NS PD Police done found some foamers on the line and was caught trespassing. They let em go, but found this video in their confiscated video TGX arrived on the inbound tracks of the classification yard, then the Southern H16-44 made its backing move to pull a cut to the freight yard. Then the TGX boxcar was seen passing through the town of Asheville on the PD, and then spotted making the backing move into the stub end freight yard. The TGX boxcar was spotted at the Packen Inshipun storage facility where the PI must have been unloading some really important papers. And then NSPD found some more videos from the confiscated foamers video camera, and another video. To view the 2Guyz and Sum trains post that tells you all about the whole TGX boxcar tour, check out the thread 2 guyz BOXCARS WORLD TOUR web site.

Friday, March 28, 2008 ~ Worked on the Allied Rail Rebuilders kit and the lift out section. Started with adding some gray latex caulk onto the wall brick sections and then started framing up the walls on the kit foundation base. Then added the roof sections without attaching them for lift out opportunities to view interior details. Also worked on the lift out section by adding styrene sheet for foundations, fuel and oil tank pads and roadways. Read more...

Sunday, March 23, 2008 ~ Worked on the backdrop extension for the area behind the freight / staging yard to accommodate continued progress with the backdrop structures. For more on this progress check out the Backdrop Work Continues blog post.
Also worked on the Walther's Kit Allied Rail Rebuilders, and you can read more on that progress from that link to the blog post.
Friday, March 14, 2008 ~ Built the Walther's Background Structure kit (seen in the left photo) and will call it a Cold Storage facility, I just need to come up with a fictional business name for the industry and then create a decal or sign to attach to the top section. The location shown in the photograph is not the actual location that the background structure will stay. The door bellows on the left side are too wide for rolling stock to pass, therefore the structure will be re-located about 5 feet to the right of the location shown in the photograph. I can modify the clearance distance of the structure at this location, however, the backdrop must be set up and painted first.
I also unboxed a set of old city scene structures from the childhood layout of the 1970's. These are structure kits that I built when I was in my teenage years and have survived 6 moves and 35+ years of being boxed up, they look well for having aged so many years.
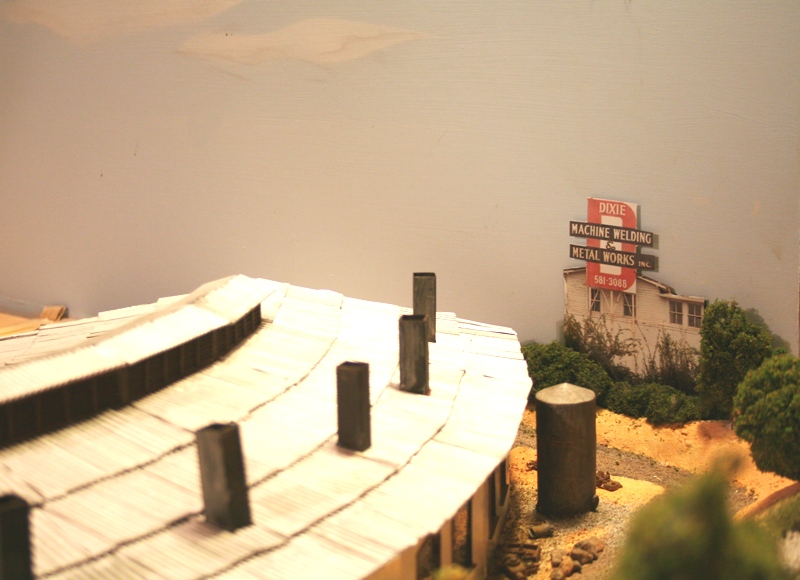
March 6, 2008 ~ Started work on some background structures and the backdrop on and also added some new clouds using a new cloud template and my air brush. Using some images from the Internet I was able to size and print them on glossy photo paper and then attached them to 1/4" thick foam core using 3M spray adhesive. I attached the "Dixie Machine Welding and Metal Works, Inc." structure backdrop to the background just behind the roundhouse. I also made a structure backdrop of an old Domino Sugar facility that was taken from an image I found on the Internet. Check out all the images of my latest work on the March 2008 page.
February 8 & 11, 2008 ~ Swing Gate Tutorial - Part II
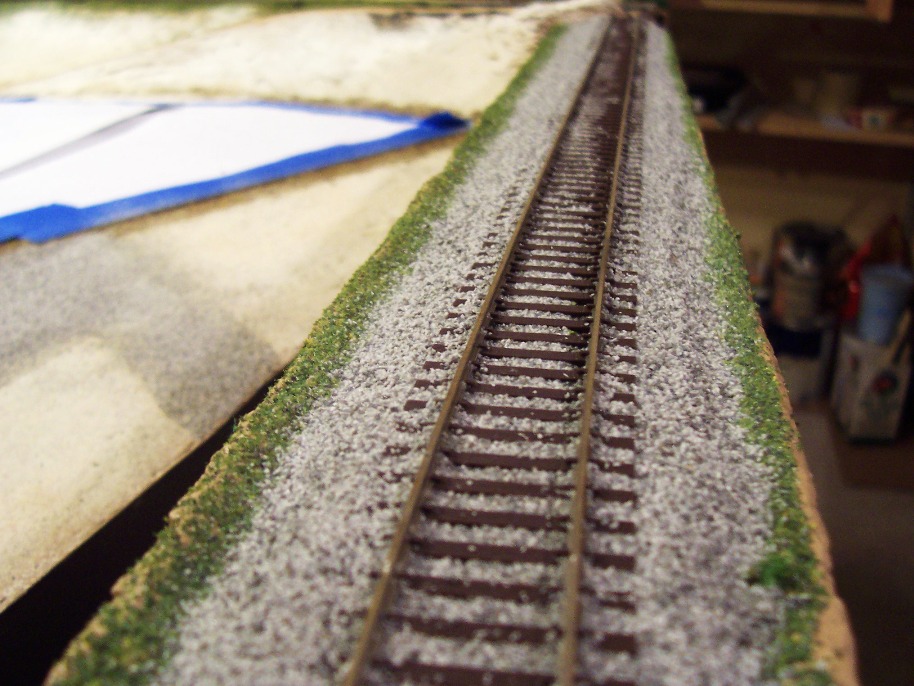
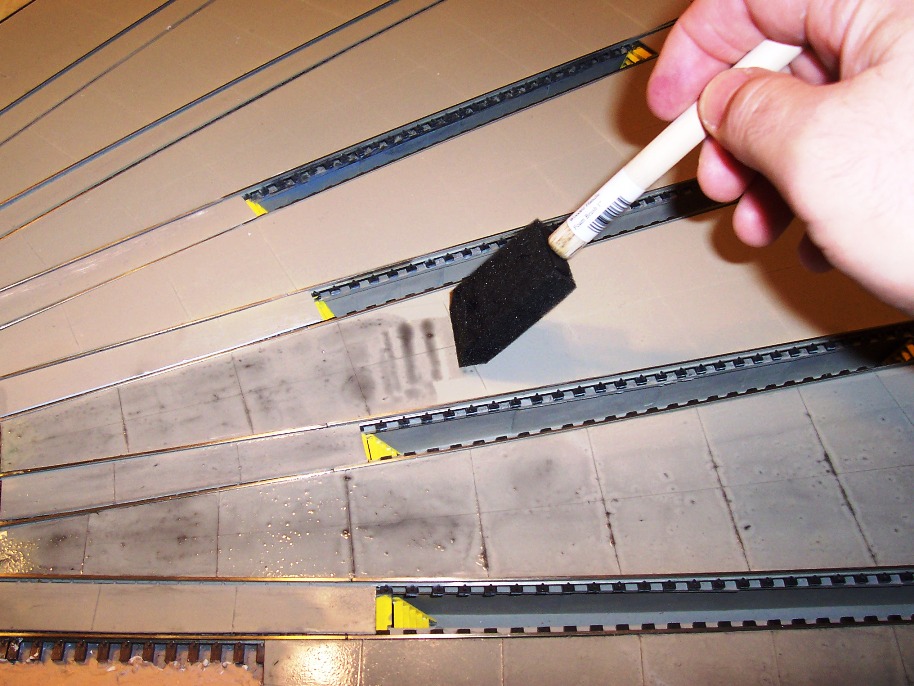
At the request of quite a few PD fans I have been updating the Building a Swing Gate an alternative to a duckunder - Part II tutorial and it has been posted. This installment covers installing the cork roadbed, applying, cutting, smoothing and wiring the track. Then I review the scenery and ballasting applications on the swing gate. The only work in progress (WIP) left for this project is the weathering of the track and scenery.
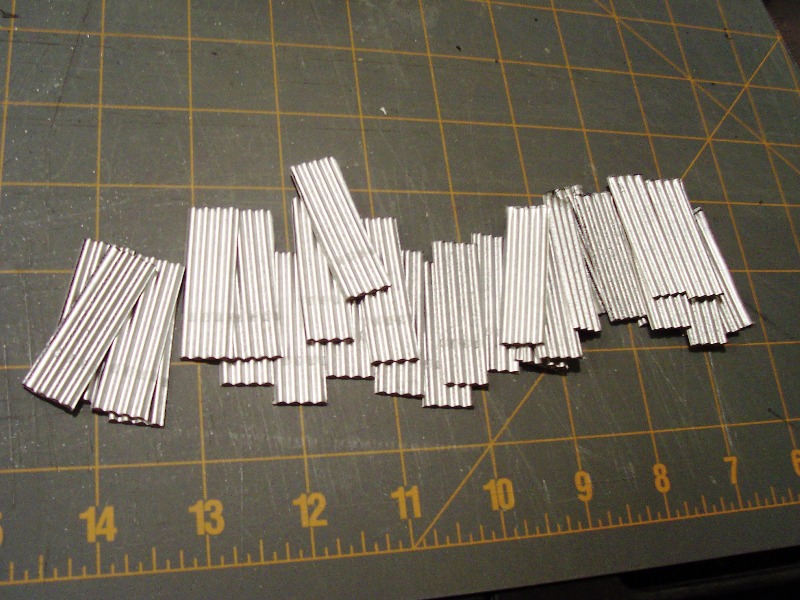
Delivery of fabricated corrugated metal roofing material arrives at the PD!
After much research and thought the decision was made to go with a metal corrugated roofing on the roundhouse, and a very economical source of material was found at Michael's Arts and Crafts store. Using corrugated paper card stock to create the 4'X12' HO scale sheets, you can view the mini-clinic at the Roundhouse Renovations page.
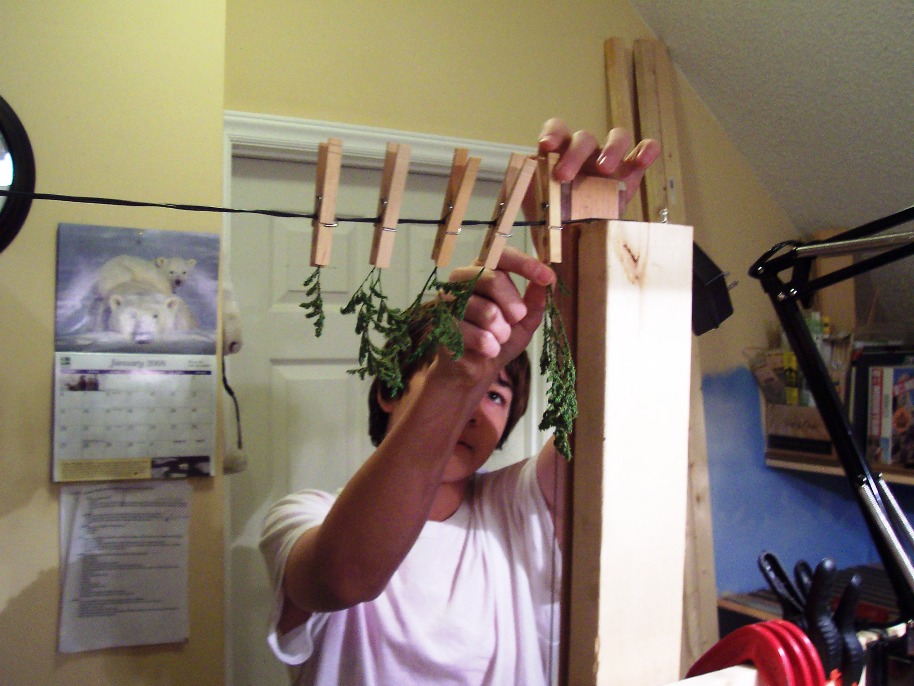
January 21, 2008 ~ Progress on the layout for a five day straight push with just over 14 hours logged between Thursday, January 17 and Monday, January 21. Including scenery base, "zip texturing" a la Joe Fugate, scenery earth tone washes, ballasting the swing gate and main line tracks, and added a gravel road. Also started the tree production using two methods with various dried floral material, poly fil, and ground scenery foam of various colors and grinds. This is Ben at work on the tree production line, utilizing the dry floral material coated with hair spray and then rolled in a special blend of ground cover foam material mixture.
Sunday, January 13, 2008 ~The scenery applications are continued on the layout, see the January 2008 for more images.
Friday to Sunday, Jan. 3 - 6, 2008 ~ Worked on the railroad and added some more scenery base to the layout roundhouse and passenger areas as well as the main line and control panel area. Also started weathering and detailing for the roundhouse project.
To view the work log click the link below. How many hours do you think I have spent on the layout so far?